One of the main features in ADF 11g is the use of taskflows. There are different kinds of taskflows. One of these is a process train. A process train (the ADF name for wizard) can be used to guide the end user step by step through a rather difficult process. In this post I describe how you can use JHeadstart to generate the wizard for you.
The very difficult (duh) process in his case is the entry of a new employee. For that I need a three step wizard.
The first steps are the same as always. Create a new fusion wep application, create new Business Components from tables, and only pick the Departments and Employees, enable JHeadstart on the view controller project, and finally create a new service definition for the datacontrol (accept al the defaults).
According to JHeadstart help, to spread items of one group over multiple wizard pages, you should place the items in an item region and set the layout style of the regions container to "separatePages". Let's do that.
Create three item Regions under the Employees group. The first one will contain "Personal" items, the second one the "Financial" data, and the last one contains all the other data. Set the layout style for the regions container to "separate pages". Take a look at the image below for the details.
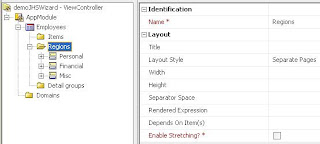 Drag all the items from the Employees group to the appropriate item groups.
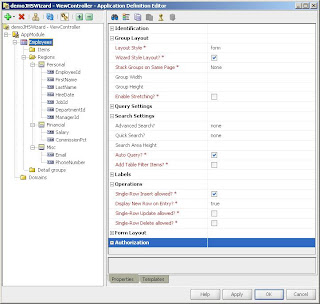
Now prepare the employees group to be generated as a wizard. First of all set the layout style to form, and check the "Wizard Style Layout" checkbox. Searching in a wizard is a little bit strange so set both Advanced- and Quick search properties to "none". In the operations part uncheck the "Single Row Update- and Delete" boxes and set "Display New Row on Entry" to true. The application Definition of the wizard should look something like this:
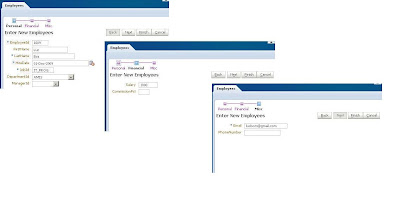
Finally generate the application and run it.
Notice how you can step through the wizard using the buttons and the train stations.

Fill out the fields in all three steps of the wizard and click finish.
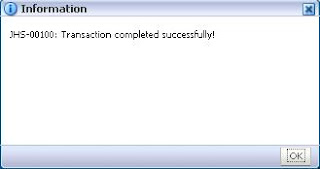
If the entered data is correct JHeadstart will show the transaction completed message.
This was a very simple wizard. More complex magic can be done with wizards, but for now this will do.
The very difficult (duh) process in his case is the entry of a new employee. For that I need a three step wizard.
The first steps are the same as always. Create a new fusion wep application, create new Business Components from tables, and only pick the Departments and Employees, enable JHeadstart on the view controller project, and finally create a new service definition for the datacontrol (accept al the defaults).
According to JHeadstart help, to spread items of one group over multiple wizard pages, you should place the items in an item region and set the layout style of the regions container to "separatePages". Let's do that.
Create three item Regions under the Employees group. The first one will contain "Personal" items, the second one the "Financial" data, and the last one contains all the other data. Set the layout style for the regions container to "separate pages". Take a look at the image below for the details.
 Drag all the items from the Employees group to the appropriate item groups.
Now prepare the employees group to be generated as a wizard. First of all set the layout style to form, and check the "Wizard Style Layout" checkbox. Searching in a wizard is a little bit strange so set both Advanced- and Quick search properties to "none". In the operations part uncheck the "Single Row Update- and Delete" boxes and set "Display New Row on Entry" to true. The application Definition of the wizard should look something like this:

Finally generate the application and run it.
Notice how you can step through the wizard using the buttons and the train stations.

Fill out the fields in all three steps of the wizard and click finish.

If the entered data is correct JHeadstart will show the transaction completed message.

This was a very simple wizard. More complex magic can be done with wizards, but for now this will do.
Comments